Basic navigation in Jetpack Compose

This is the most basic setup that for navigation in Jetpack Compose — just two screens and two buttons. All you need to get onboarding of how to move around in your mobile app.
The goal
The goal is to get a basic basic knowledge on how to move around in your mobile application. I found that most tutorials out there are:
- Too confusing to follow
- Too steep, too fast
- Too many things around that don’t belong to the topic
Which makes them hard to understand. That’s why this will be very very basic. Very. Basic.
What you will learn
We will go through the basic concepts of how add a basic navigation to your project. The simple steps are:
- Project setup
- Navigation setup
- Stack handling
1. Project setup
Start a new Jetpack Compose application.

Create a new Kotlin file in root of project (like com.myapplication) called MainScreen. This will hold all the navigation functionality.

Just add an empty composable:
@Composable
fun MainScreen(){}
Remove MainActivity class with a clean plate and add the MainScreen. This file will not be used further, so you can save it and close it.
class MainActivity : ComponentActivity() {
override fun onCreate(savedInstanceState: Bundle?) {
super.onCreate(savedInstanceState)
setContent {
MyApplicationTheme {
Surface(
modifier = Modifier.fillMaxSize(),
color = MaterialTheme.colors.background
) {
MainScreen()
}
}
}
}
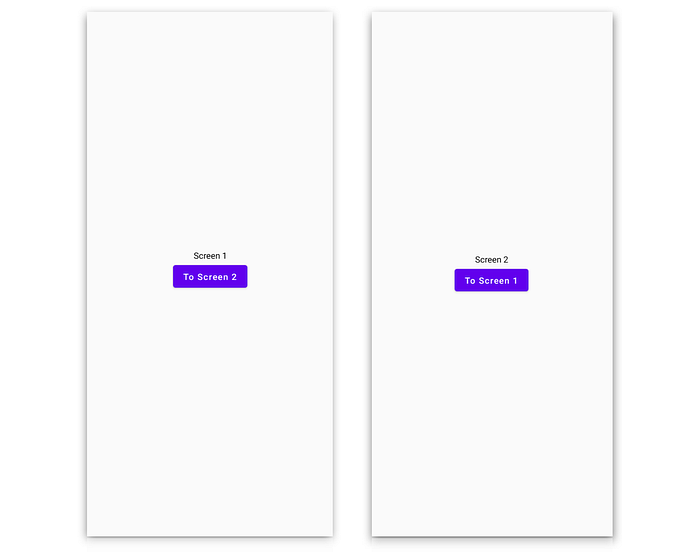
}Add two new composables — ScreenOne and ScreenTwo. Add a text and a button.

@Composable
fun ScreenOne(){
    Column(
        verticalArrangement = Arrangement.Center,
        horizontalAlignment = Alignment.CenterHorizontally,
        modifier = Modifier.fillMaxSize()
    ) {
        Text(text = "Screen 1")
        Button(onClick = { /*TODO*/ }) {
            Text(text = "To Screen 2")
        }
    }
}
@Composable
fun ScreenTwo(){
Column(
verticalArrangement = Arrangement.Center,
horizontalAlignment = Alignment.CenterHorizontally,
modifier = Modifier.fillMaxSize()
) {
Text(text = "Screen 2")
Button(onClick = { /*TODO*/ }) {
Text(text = "To Screen 1")
}
}
}Got to app/build.gradle
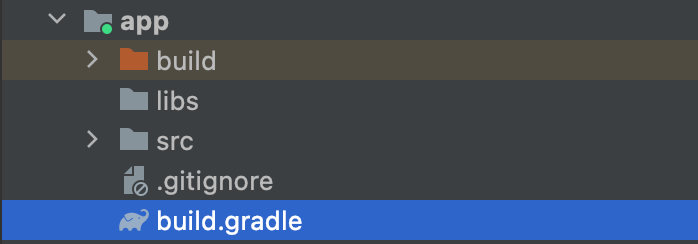
Implement the Navigation dependency. The latest version can be found here: https://developer.android.com/jetpack/androidx/releases/navigation
dependencies {
    implementation("androidx.navigation:navigation-compose:2.5.3")
...
}
Don’t forget to update the Gradle sync.
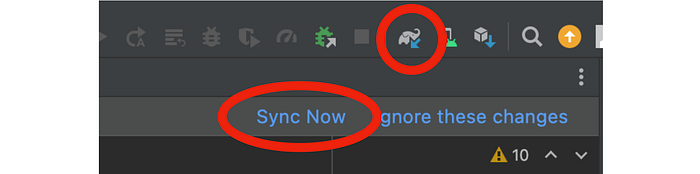
Wait a moment for the Gradle to build. Then the setup is done.
2. Navigation setup
The setup is deadly simple — you will have two screens. When you click on a button you will go to the other screen.
There are som variations on this setup, but this is the simplest I found out yet. The common of all setups is the same, though :
- You will have a route
- The route will have a screen path
- The path will connect to a destination composable
- When you choose a path, the Navigation will search in a list of composables and show the connected destination via the selected screen path
Set up the routing
The routing is wrapped around NavHost. In short is the NavHost responsible for linking a path to a destination. We also need to remember which route that have been selected, and that is done with rememberNavController and last there is a composable that is needed to provide a route.
Okay. Let us make some magic!
In MainScreen we need to import some navigation dependencies.
import androidx.navigation.compose.rememberNavController
import androidx.navigation.compose.NavHost
import androidx.navigation.compose.composable
Set up a Screen List
We need a list of screens that we want to use. The enum class let us use both key and value in an easy way. The enum names can be whatever you like, but for the clarity we use the same names as the composables as we created.
enum class ScreenList {
    ScreenOne,
    ScreenTwo
}
@Composable
fun MainScreen(){}
Define the NavController
Add a NavController inside MainScreen.
@Composable
fun MainScreen(){
    val navController = rememberNavController();
}
The NavController is used to navigate around your application. It will for example hold the selected screen path that will be used to connect to a specific destination.
Add NavHost
Add the NavHost with this little chunk of code:
NavHost(
    navController = navController,
    startDestination = ScreenList.ScreenOne.name) {
    composable(ScreenList.ScreenOne.name) { ScreenOne() }
    composable(ScreenList.ScreenTwo.name) { ScreenTwo() }
}
In NavHost we will use the navController to hold our selected path. It has a startDestination, otherwise it doesn’t know where to start. And at the end there are our composable list. Inside the parentheses we put the route name and after that the screen it should navigate to.
composable(<Path name>) { <Screen to go to>}If we run this you should see the first page. Wow!
Add interactivity
Well. Nothing happens when we click on the button. Time to change it.
First we must push the navController down from parent composable MainScreen to ScreenOne and ScreenTwo. Inside the parantheses of ScreenOne and ScreenTwo, we just add the navController:
composable(ScreenList.ScreenOne.name) { ScreenOne(navController) }
composable(ScreenList.ScreenTwo.name) { ScreenTwo(navController) }
Now you get some red waves, telling there are to many arguments and that’s because we don’t have any inScreenOne or in ScreenTwo. Open up the composables and add navController at the top:
import androidx.navigation.NavController

@Composable
fun ScreenOne(
    navController: NavController
){
...
}
Now go down to the button and add the path to the destination you want to go to:
Button(onClick = { navController.navigate(ScreenList.ScreenTwo.name)  }) {
    Text(text = "To Screen 2")
}
(Remember that button on ScreenOne should go to ScreenList.ScreenTwo.name and vice versa…)
Okay. We’re done! You click on a button and then you will be directed to another screen.
3. Stack handling
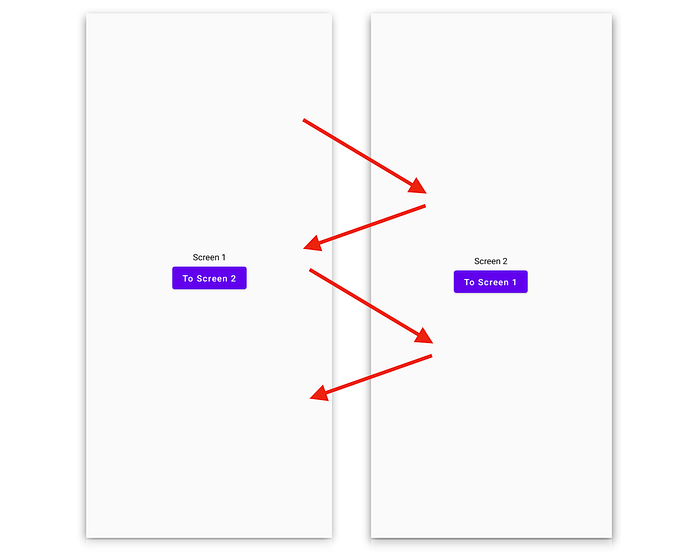
There are a problem with this and it is called the stack. Every time you click on a button it will add a new screen to on the top of the stack.
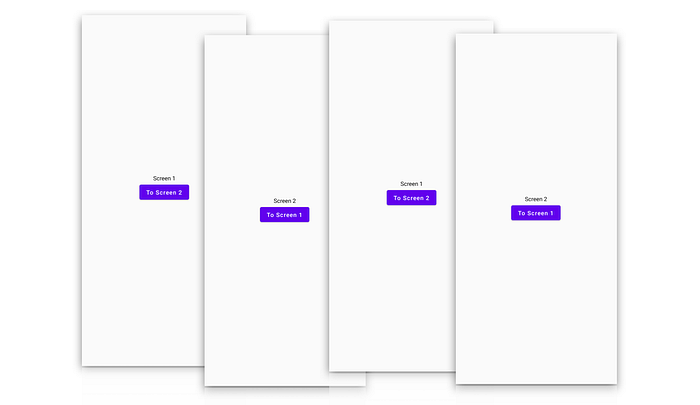
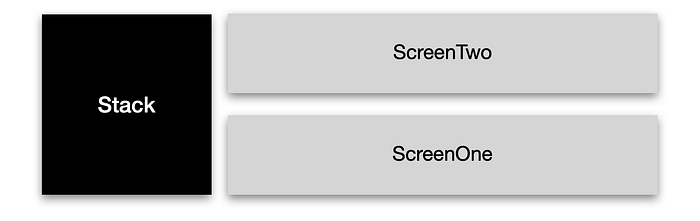
A short explanation: When you enter the application, the ScreenOne will be at the bottom of the stack. When you click on button on ScreenOne you will add ScreenTwo to the stack on top of ScreenOne and after clicking on the button on ScreenTwowith popBackStack, that path will be removed and we are back on the bottom of the stack with ScreenOne. Easy? :-)
If you the use the back-button on the device, you will go back in the stack witch will make you change screen until you get to the end of the stack, and it will then close the application.
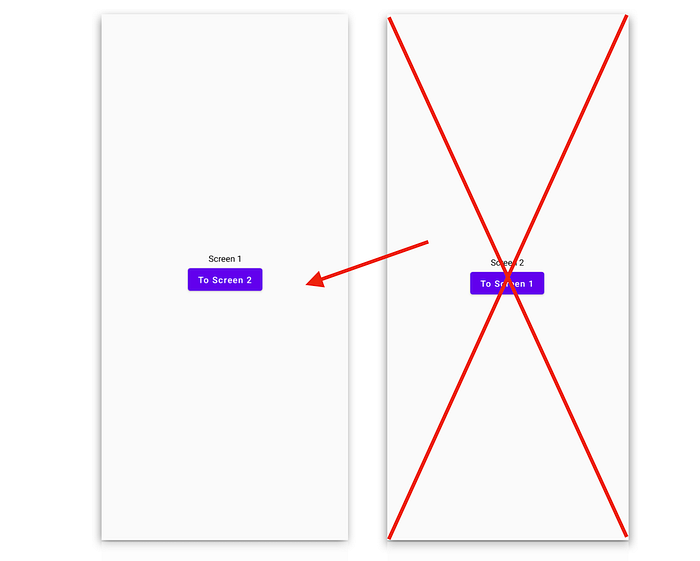
If we imagine that ScreenTwo is a sub-screen to ScreenOne, we want to throw away ScreenTwo when we leave it and prevent it to add the ScreenOne on top.
It is an easy fix. Just use popBackStack instead on the button onScreenTwo and the path will be removed from the stack.
Button(onClick = { navController.popBackStack() })Well, that’s it! Now you will know more about basic navigation.
Happy coding!
4. Overview of files
Here are the complete files to get an overview.
MainScreen
package com.myapplication
import androidx.compose.runtime.Composable
import androidx.compose.ui.tooling.preview.Preview
import androidx.navigation.compose.rememberNavController
import androidx.navigation.compose.NavHost
import androidx.navigation.compose.composable

enum class ScreenList {
    ScreenOne,
    ScreenTwo
}
@Composable
fun MainScreen(){
    val navController = rememberNavController();
    NavHost(
        navController = navController,
        startDestination = ScreenList.ScreenOne.name) {
        composable(ScreenList.ScreenOne.name) { ScreenOne(navController) }
        composable(ScreenList.ScreenTwo.name) { ScreenTwo(navController) }
    }
}
ScreenOne
package com.myapplication
import androidx.compose.foundation.layout.Arrangement
import androidx.compose.foundation.layout.Column
import androidx.compose.foundation.layout.fillMaxSize
import androidx.compose.material.Button
import androidx.compose.material.Text
import androidx.compose.runtime.Composable
import androidx.compose.ui.Alignment
import androidx.compose.ui.Modifier
import androidx.navigation.NavController

@Composable
fun ScreenOne(
    navController: NavController
){
    Column(
        verticalArrangement = Arrangement.Center,
        horizontalAlignment = Alignment.CenterHorizontally,
        modifier = Modifier.fillMaxSize()
    ) {
        Text(text = "Screen 1")
            Button(onClick = { navController.navigate(ScreenList.ScreenTwo.name)  }) {
                Text(text = "To Screen 2")
            }
    }
}
ScreenTwo
package com.myapplication
import androidx.compose.foundation.layout.Arrangement
import androidx.compose.foundation.layout.Column
import androidx.compose.foundation.layout.fillMaxSize
import androidx.compose.material.Button
import androidx.compose.material.Text
import androidx.compose.runtime.Composable
import androidx.compose.ui.Alignment
import androidx.compose.ui.Modifier
import androidx.navigation.NavController

@Composable
fun ScreenTwo(
    navController: NavController
){
    Column(
        verticalArrangement = Arrangement.Center,
        horizontalAlignment = Alignment.CenterHorizontally,
        modifier = Modifier.fillMaxSize()
    ) {
        Text(text = "Screen 2")
        Button(onClick = { navController.popBackStack() }) {
            Text(text = "To Screen 1")
        }
    }
}